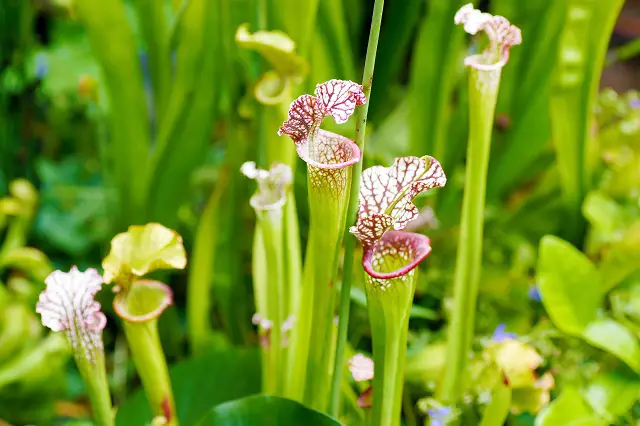
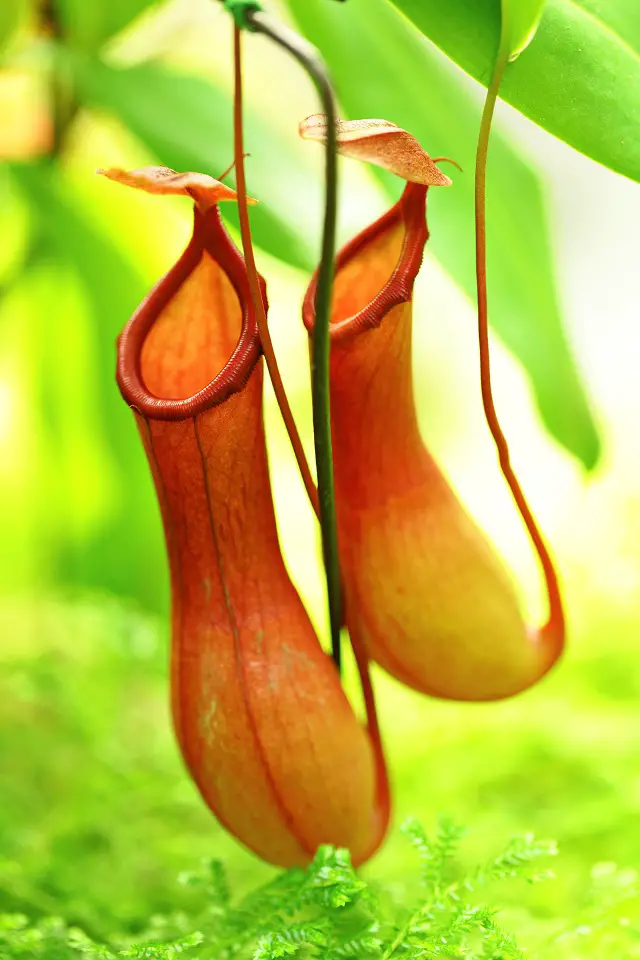
Pitcher Plant Care: Simply put, a pitcher plant is a unique and fascinating carnivorous species native to various parts of the world, such as the United States, Asia, and Australia. These plants are known for their distinctive funnel-like leaves that are shaped like pitchers or vases, hence the name. These leaves are actually modified to trap insects and small creatures, which serve as a source of nutrients for the plant since it grows in soil that is low in nutrients.
So, if you’re a nature lover, growing a pitcher plant is definitely a must! Remember, they’re not your average houseplant and require special care to thrive. But don’t worry; with a little love and attention, you’ll have a happy and healthy pitcher plant in no time!
Characteristics of pitcher plants
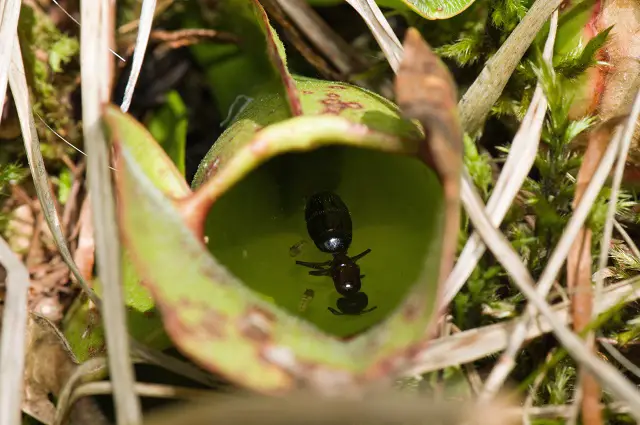
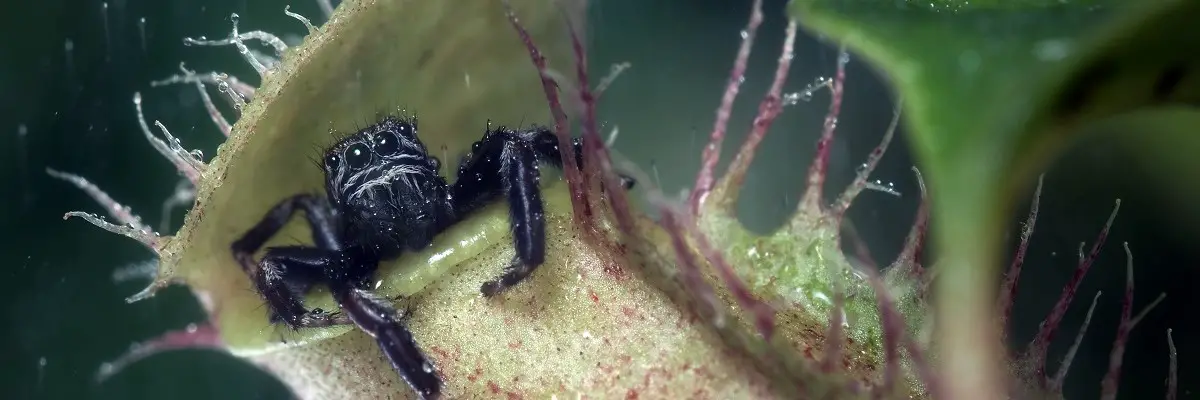
Well, let me tell you, pitcher plants are some of the coolest plants around! They have a lot of unique and interesting characteristics that set them apart from other plants. Firstly, they’re carnivorous, meaning they trap and digest insects and other small creatures to supplement their diet. This is because they typically grow in soil that’s poor in nutrients, so they have to find other ways to get the nourishment they need to survive.
Another cool thing about pitcher plants is their shape. Their leaves are modified into a funnel or pitcher-like shape, and the rim of the pitcher is often sticky and brightly colored to attract their prey. Once the insects get trapped in the pitcher, they can’t escape, and the plant uses digestive enzymes to break down their bodies and absorb the nutrients.
Additionally, pitcher plants come in a variety of shapes and sizes, from tall and towering to small and compact. Some species even produce beautiful, sweet-smelling flowers that attract even more insects into their traps.

Importance of proper care for pitcher plants
Proper care is necessary if you want your pitcher plant to stay healthy and look its best. These plants are definitely not the low-maintenance type but trust me, they’re worth the extra effort.
Firstly, pitcher plants need the right environment to thrive. This includes the right temperature, humidity, light levels, and the right type of soil or potting mix. If the conditions are too hot, cold, wet, or dry, your plant will let you know, and it won’t look pretty.
Secondly, watering is another important factor. Pitcher plants like to be consistently moist, but not waterlogged. Overwatering can lead to root rot, and underwatering can cause the leaves to wilt and the plant to look sickly. So, finding the right balance is key.
Next up, feeding. These plants may be carnivorous, but they still need a balanced diet to stay healthy. You can feed them a small amount of fertilizer every now and then or supplement their diet with the occasional insect.
Finally, repotting is important for pitcher plants, too. They need more room for their roots and more soil to absorb moisture as they grow. Just be sure to use the right potting mix and give your plant enough time to settle into its new home before you start watering again.
Environment For Your Pitcher Plant
| Ideal temperature and humidity for pitcher plants |
|---|
| Ah, the temperature and humidity – are two of the most important factors for keeping your pitcher plant happy and healthy. Let’s break it down. When it comes to temperature, these plants prefer it on the cooler side. Ideally, you want to keep the temperature between 60°F and 80°F. Anything above or below that range, your plant will start showing signs of stress. Humidity is also important for pitcher plants. They like it moist but not too damp. Relative humidity between 50-70% is ideal. If the air is too dry, the leaves will start to curl, and if it’s too humid, the plant can get waterlogged, which can lead to root rot. So, if you want your pitcher plant to be at its best, make sure the temperature and humidity levels are just right. And if you’re not sure what the levels are like in your home, you can buy a cheap hygrometer to keep tabs on the humidity. Trust me; it’s worth it! |
| Light requirements for pitcher plants |
|---|
| Light is crucial for pitcher plants, just like it is for most living things. These plants prefer bright, indirect light. So, you don’t want to place them in direct sunlight, as that can cause sunburn and other damage to the leaves. On the other hand, too little light will cause the plant to become leggy and weak, and the leaves will start to look pale and sad. So, you need to find that sweet spot in the middle where the light is bright, but not too intense. If you’re having trouble finding the right spot for your pitcher plant, a north or east-facing windowsill is usually a good choice. The light will be bright but indirect, and your plant will be happy. In summary, light is essential for keeping your pitcher plant healthy and thriving. Just make sure it’s not too intense or too dim, and you’ll have a happy and healthy plant that’s a joy to look at. |
| Potting mix for pitcher plants |
|---|
| When it comes to potting mix for pitcher plants, you want to use something that’s specifically designed for carnivorous plants. Regular potting soil won’t cut it, as these plants need a well-draining mix that doesn’t contain any nutrients that could harm the plant. A good pitcher plant potting mix usually contains sphagnum moss, perlite, sand, and peat moss. This type of mix will help the plant absorb moisture while also allowing excess water to drain away, which is important for avoiding root rot. When potting your pitcher plant, make sure to use a pot with drainage holes in the bottom. And don’t be afraid to add a layer of gravel or sand to the bottom of the pot to help with drainage. In conclusion, the right potting mix is essential for keeping your pitcher plant healthy and happy. So, make sure you use a mix that’s specifically designed for carnivorous plants, and your plant will be good to go! |
Watering pitcher plants
| How much water should a pitcher plant receive? |
|---|
| Watering a pitcher plant is all about finding that sweet spot between too much and too little. These plants it is moist but not soaking wet. So, it’s important to get the balance just right. The first thing to keep in mind is that pitcher plants are native to areas with high humidity and lots of rainfall. So, they’re used to having their roots in constantly moist soil. But that doesn’t mean you should be watering them every day. A good rule of thumb is to water your pitcher plant once a week, but be sure to check the soil regularly to see if it needs more or less water. If the soil feels dry an inch below the surface, it’s time to water. If it feels damp, hold off for a few days. When you do water your pitcher plant, make sure to use distilled or rainwater. Tap water can contain minerals and chemicals that could harm the plant. And be sure to water the soil, not the leaves, as the leaves can easily get waterlogged and develop fungal diseases. In short, watering your pitcher plant is all about finding the right balance between too much and too little. Just be sure to check the soil regularly, use distilled or rainwater, and water the soil, not the leaves, and your plant will be good to go! |
| Signs of over-watering or under watering |
|---|
| Knowing the signs of over-watering or under-watering is crucial for keeping your pitcher plant healthy. After all, if you don’t catch the issue early, it could lead to serious problems down the road. Let’s start with over-watering. If you give your plant too much H2O, you’ll notice the leaves turning yellow and mushy. This is because the roots are drowning in water and can’t get the air they need to survive. If you see this happening, it’s time to take action. The first step is to empty any standing water from the tray under the pot. Then, let the soil dry out completely before watering again. And be sure to reduce the amount of water you’re giving the plant in the future. Under-watering is just as big of a problem as over-watering. If you’re not giving your pitcher plant enough water, you’ll start to notice the leaves turning brown and crispy. This is because the plant is desperate for moisture and is starting to wilt. The solution to under-watering is simple: give your plant a good drink. And be sure to increase the frequency of your watering so that the soil doesn’t dry out completely again in the future. In conclusion, recognising the signs of over-watering or under-watering is essential for keeping your pitcher plant healthy. So, keep an eye on the leaves, and adjust your watering habits accordingly; your plant will be good as gold! |

Feeding Your Pitcher Plant
| =Nutritional needs of pitcher plants |
|---|
| Just like us, pitcher plants need a balanced diet to thrive. But before we dive into their nutritional needs, let’s talk about what makes them different from other plants. Pitcher plants are carnivores! That’s right, they trap and digest insects to get the necessary nutrients. So, unlike most plants, they don’t need fertilizer. But that doesn’t mean they don’t need anything at all. In fact, pitcher plants need a few key nutrients to grow and produce those pretty pitchers. First and foremost, they need nitrogen. Nitrogen is the building block of chlorophyll, which allows the plant to photosynthesize and produce energy. Second, they need phosphorus. Phosphorus helps the plant develop strong roots and healthy pitchers. Finally, they need potassium. Potassium helps the plant regulate water and maintain healthy growth. So, while pitcher plants don’t need fertilizer, they still need a few key nutrients to thrive. Just be sure to give them a balanced diet, and they’ll keep producing those beautiful pitchers for years to come. |
| Methods of feeding pitcher plants |
|---|
| Now that we know what the pitcher plants need let’s talk about how to give it to them. First things first, if you’re growing your pitcher plant indoors, you probably don’t have to worry about feeding it insects. But, if you’re growing it outdoors and want to give it a little extra boost, you can use a few different methods. First, you can feed your pitcher plant live insects. This is the most natural way to feed a pitcher plant and can help it produce more pitchers. Just be careful not to overdo it, or you might harm your plant. Second, you can use fertilizer. Look for a fertilizer that’s high in nitrogen, phosphorus, and potassium, the key nutrients that pitcher plants need. Finally, you can make your fertilizer. To do this, mix together equal parts of ammonia, baking soda, and sugar. Then, mix this fertilizer into your water to water your pitcher plant. So, there you have it! Three different methods for feeding your pitcher plant. Whether you choose to use live insects, fertilizer or make your own, just be sure to give your plant a balanced diet, and it will thank you with a bountiful harvest of pitchers. |
| How often to feed pitcher plants |
|---|
| Okay, so you’ve got your feeding methods down, but when should you actually be feeding your pitcher plant? Well, it depends. If you’re growing your pitcher plant indoors, you probably don’t need to feed it at all. Indoor plants usually get all the nutrients they need from the potting mix and the occasional watering. However, if you’re growing your pitcher plant outdoors, you’ll want to feed it a little more often. If you’re using live insects, you should aim to feed your plant once a week. Just drop a few insects into each pitcher, and your plant will do the rest. If you’re using fertilizer, you should follow the instructions on the label. Usually, you’ll want to feed your pitcher plant every 2-4 weeks. And if you’re making your fertilizer, you can feed your pitcher plant once a month. So there you have it! A quick overview of how often you should be feeding your pitcher plant. Just remember to be careful not to overfeed it, or you might harm your plant. Stick to the recommended schedule, and your pitcher plant will thrive. |
Repotting Your Pitcher Plant
| When to repot a pitcher plant |
|---|
| Well, if you’re asking when it’s time to give your pitcher plant a new home, there are a few signs you should look out for. Firstly, you’ll want to keep an eye on the size of your plant. If it’s starting to look cramped in its pot, it’s probably time to upgrade to a larger one. Secondly, keep an eye on the potting mix. If it’s starting to look worn out, it’s probably time to replace it with a fresh batch. And thirdly, if you’ve been growing your pitcher plant for a while and haven’t repotted it yet, it’s probably time to do so. Pitcher plants tend to grow pretty slowly, so if it’s been a year or more since you last repotted it, it’s probably time for an upgrade. So there you have it! Here is a quick rundown of when it’s time to repot your pitcher plant. Just remember, repotting can be a bit stressful for your plant, so make sure you do it gently and carefully. Your plant will thank you for it. |
| How to properly repot a pitcher plant |
|---|
| Well, repotting your pitcher plant is a pretty straightforward process, but there are a few things you want to keep in mind to make sure you do it right. First off, make sure you’ve got all the right supplies. You’ll need a new pot, fresh potting mix, and a handful of sphagnum moss. Next, gently remove your pitcher plant from its old pot. If it’s been in there a while, it might be a bit root-bound, so be careful not to damage the roots. Once you’ve got your plant out of its old pot, give the roots a gentle shake to remove any old potting mix. Now, take your new pot and add a layer of potting mix to the bottom. Make sure the potting mix is moist but not soaking wet. Place your pitcher plant on top of the potting mix and add more potting mix around the roots, making sure to firm it down gently, so the plant stays in place. Now, place your sphagnum moss on top of the potting mix. This will help to keep the potting mix moist and prevent it from drying out too quickly. Finally, give your newly repotted pitcher plant a good drink of water and place it in a bright, warm spot where it’ll get the right amount of light and humidity. And there you have it! A quick and easy guide to repotting your pitcher plant. Just remember, like most things in life, it pays to be gentle and take your time. Happy repotting! |
Tips for successful repotting
- Choose the right time: Timing is everything, so make sure to report your pitcher plant when it’s not actively growing. Late winter or early spring is usually the best time.
- Pick the perfect pot: A pot with good drainage is key. Make sure it’s just big enough for the roots but not too big that the soil stays too moist for too long.
- Use quality soil: A good-quality, well-draining potting mix is a must. You can use a mix of peat moss, perlite, and sand for the best results.
- Gently remove the plant: When you remove the pitcher plant from its old pot, be gentle! Try not to disturb the roots too much, but if they’re root-bound, it’s okay to loosen them up a bit gently.
- Place the plant in the new pot: Make sure the plant is situated in the center of the pot and that the top of the soil is even with the rim of the pot.
- Add soil: Fill in the pot with soil until it’s about 2/3 full. Then, gently press down on the soil to remove any air pockets.
- Water it: Give your newly potted pitcher plant a good drink of water. Make sure the soil is moist but not soaking wet.
- Give it some time: Give your pitcher plant some time to settle in. Don’t fertilize it immediately, and keep an eye on it to ensure it’s not wilting. If it is, give it a little more water.
- Watch and wait: With proper care, your pitcher plant will be happy in its new home in no time! Just keep an eye on it and make any necessary adjustments to ensure its health and happiness.
Propagation
| How to propagate pitcher plants |
|---|
| Propagating pitcher plants is a great way to expand your collection and have more of these unique plants around your home. Here’s the lowdown on how to do it right. First, you can propagate pitcher plants using seeds or by division. If you go the seed route, you’ll need to be patient – it can take several months for them to sprout. However, the division is a faster method that can be done when you repot your plant. Simply divide the root ball into two or more sections, making sure each section has plenty of roots. When propagating by division, it’s important to plant each section in a pot with a well-draining potting mix, water it thoroughly and then place it in a bright but indirect light. Keep the soil consistently moist but not waterlogged. Within a few weeks, new growth should start to appear, and you’ll have a new pitcher plant! The process is a bit more involved if you’re propagating from seed. You’ll need to sow the seeds in a sterile potting mix, cover them with a thin layer of soil, and then mist them regularly to keep the soil moist. Place the pot in a bright but indirect light and wait for the seeds to sprout. This can take anywhere from a few weeks to several months. Once the seedlings have emerged, you can gently transplant them into individual pots and continue to care for them as you would a mature pitcher plant. With a little TLC, they’ll be thriving in no time! So whether you’re a seasoned grower or a first-timer, propagating pitcher plants is a fun and rewarding experience. Give it a try and see for yourself! |

Tips for successful propagation
When it comes to propagating your pitcher plant, you can follow a few tips to increase your chances of success. First and foremost, make sure you’ve got the timing right. The best time to propagate is in the spring or early summer when the plant is actively growing. Next, take a cutting from a healthy, mature plant. Make sure it’s a good length, around 4-6 inches, and has a few leaves. Then, remove the bottom leaves and dip the cut end in rooting hormone.
Plant your cutting in a well-draining potting mix and water it in. Keep the soil moist but not too wet, and place it in a warm, bright spot, but not in direct sunlight. To increase the humidity around your cutting, you can cover it with a plastic bag or place it in a propagator.
Finally, be patient! Propagation can take time, so don’t be discouraged if you don’t see roots immediately. Keep an eye on the soil moisture and ensure it’s not getting too dry. With a little TLC, you’ll have a new, thriving pitcher plant in no time!
Pests and Diseases
| Common pests that affect pitcher plants |
|---|
| Common pests that can be a pain in the neck for pitcher plants include aphids, mealybugs, spider mites, and scale insects. These little buggers can damage the leaves, stems, and roots of your plant and potentially cause it to wilt and die if left unchecked. To keep your pitcher plant healthy and happy, it’s important to keep an eye out for these pests and take action quickly if you spot any signs of infestation. Some ways to do this include regularly inspecting your plant, washing the leaves with a gentle soap and water solution, and using an insecticide if necessary. Just be sure to follow the instructions carefully, as some insecticides can be harmful to your plant if not used properly. In any case, a little bit of prevention can go a long way in keeping your pitcher plant pest-free! |
| Signs of pest infestation |
|---|
| Sure thing! To know if your pitcher plant has unwanted guests, look out for the following signs: -Yellowing or wilting of leaves: This could indicate a pest is sapping the plant of its nutrients. -Sticky residue or webbing: This is a classic sign of spider mites. -Holes in leaves: This could be a sign of leaf-chewing insects like caterpillars. -Black or brown spots: This is a sign of fungal diseases caused by overwatering or high humidity. Keep an eye out for these signs and address them ASAP to keep your plant healthy and happy! |
| Prevention and treatment methods for pest and disease issues |
|---|
| When it comes to pests and diseases, prevention is key. To keep your pitcher plants healthy, ensure they’re not overcrowded and provide proper care, including the right amount of light, water, and nutrients. If you do spot a problem, don’t wait to take action. Here are a few tips for keeping your pitcher plants pest and disease-free: Keep the area around your plants clean and free of debris. Check your plants regularly for signs of pests or disease, like yellowing leaves or unusual growth patterns. If you spot a problem, isolate affected plants to prevent it from spreading to others. Use natural, non-toxic pest control methods, like neem oil or soap sprays, whenever possible.If you need to use chemical pesticides, follow the label instructions carefully and make sure to wear protective gear. Consider using companion plants, like marigolds or basil, which are known to repel certain pests. Taking these steps can help ensure that your pitcher plants stay healthy and thrive. |
Conclusion
Pitcher plants are unique and beautiful, but to keep them healthy and happy, it’s important to provide them with the right care. Here’s a quick recap of some key tips:
- Provide bright, filtered light.
- Keep the temperature and humidity levels ideal.
- Use a well-draining potting mix, and don’t go over or under water.
- Give your pitcher plants the right nutrition by feeding and repotting them when necessary.
- Propagate your plants successfully by following the right methods.
- Keep an eye out for common pests and treat them quickly if you spot them.
Pitcher plants are truly one of nature’s wonders, and with the right care, they can make for an incredible addition to any garden or collection. They are visually stunning and play a crucial role in their ecosystem by providing homes and nourishment for many species of insects. So, pitcher plants are definitely worth looking into if you’re a fan of unique and unusual plants!


